Ceph Integration with ISCSI
Prepare the image VMWARE_DISK1
apt install ceph-iscsi
- Create rbd pool with PG autoscaling with name myrbd
[root@ceph1 ~]# ceph osd pool create myrbd
[root@ceph1 ~]# ceph osd pool application enable myrbd rbd
- Create the image VMWARE_DISK1 in myrbd pool
[root@ceph1 ~]# rbd –pool myrbd create VMWARE_DISK1 –size=100G
Deploy the iSCSI gateways
- Deploy the iSCSI gateways in ceph2 & ceph3
[root@ceph1 ~]# ceph orch apply iscsi myrbd admin admin01 –placement ceph2,ceph3 –trusted_ip_list 10.9.0.24,10.9.0.25
- Check deployment
[root@ceph1 ~]# ceph orch ls
NAME RUNNING REFRESHED AGE PLACEMENT
alertmanager 1/1 100s ago 6h count:1
crash 3/3 103s ago 6h *
grafana 1/1 100s ago 6h count:1
iscsi.iscsi 2/2 103s ago 2m ceph2;ceph3
mgr 2/2 102s ago 6h count:2
mon 3/3 103s ago 4h ceph1;ceph2;ceph3
node-exporter 3/3 103s ago 6h *
osd.all-available-devices 9/9 103s ago 3h *
prometheus 1/1 100s ago 6h count:1
Configure iSCSI TARGETS( BELOW THIS =CEPH2)
- In ceph2 server, find iscsi container (MUST BE CEPH2)
[root@ceph2 ~]# cephadm ls –no-detail | jq ‘.[].name’
“crash.ceph2”
“mgr.ceph2.dqggxs”
“node-exporter.ceph2”
“mon.ceph2”
“osd.1”
“osd.4”
“osd.7”
“iscsi.iscsi.ceph2.kovryz”
- Connect to the iscsi container with cephadm
[root@ceph2 ~]# cephadm enter -n iscsi.iscsi.ceph2.kovryz
Inferring fsid 78c597f2-6080-11eb-b0a3-8ee8efbd56e1
[ceph: root@ceph2 /]#
- Check iscsi gateway
[ceph: root@ceph2 /]# gwcli ls

- Go to iscsi-targets and create a target with the name iqn.2021–01.lan.mandem.iscsi-gw:iscsi-igw
[ceph: root@ceph2 /]# gwcli
/> cd /iscsi-targets
/iscsi-targets> create iqn.2021-01.lan.mandem.iscsi-gw:iscsi-igw
ok
- Create the iSCSI gateways (note : gateway host must be the same as API gateways. Ex: test-ceph1.yuga2)
/iscsi-targets> cd iqn.2021-01.lan.mandem.iscsi-gw:iscsi-igw/gateways/iscsi-target…-igw/gateways> create ceph2 10.9.0.24
Adding gateway, sync’ing 0 disk(s) and 0 client(s)
ok
/iscsi-target…-igw/gateways> create ceph3 10.9.0.25
Adding gateway, sync’ing 0 disk(s) and 0 client(s)
ok
- Add the RBD image with the name VMWARE_DISK1 in the pool myrbd
/iscsi-target…-igw/gateways> cd /disks
/disks> attach myrbd/VMWARE_DISK1
- Create a client with the initiator name iqn.2021-01.lan.mandem:rh8-client
/disks> cd /iscsi-targets/iqn.2021-01.lan.mandem.iscsi-gw:iscsi-igw/hosts
/iscsi-target…csi-igw/hosts> create iqn.2021-01.lan.mandem:rh8-client
- Set the client’s CHAP
/iscsi-target…em:rh8-client> auth username=iscsiadmin password=iscsiadmin01
- Add the disk to the client
/iscsi-target…em:rh8-client> disk add myrbd/VMWARE_DISK1
iSCSI Discovery and Multipath Device Setup
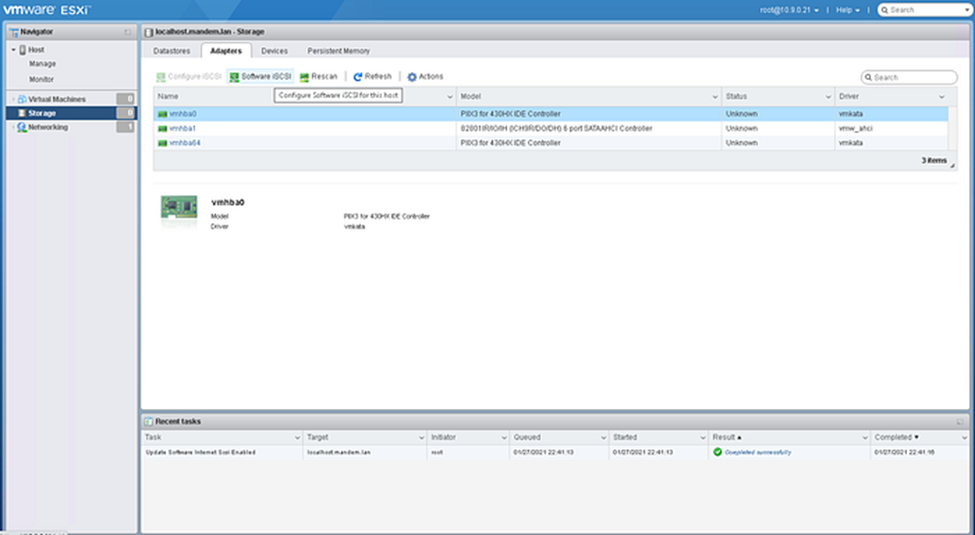
- Enable Software iSCSI
- Click on “Storage” from “Navigator”, and select the “Adapters” tab. From there right click “Software iSCSI”.
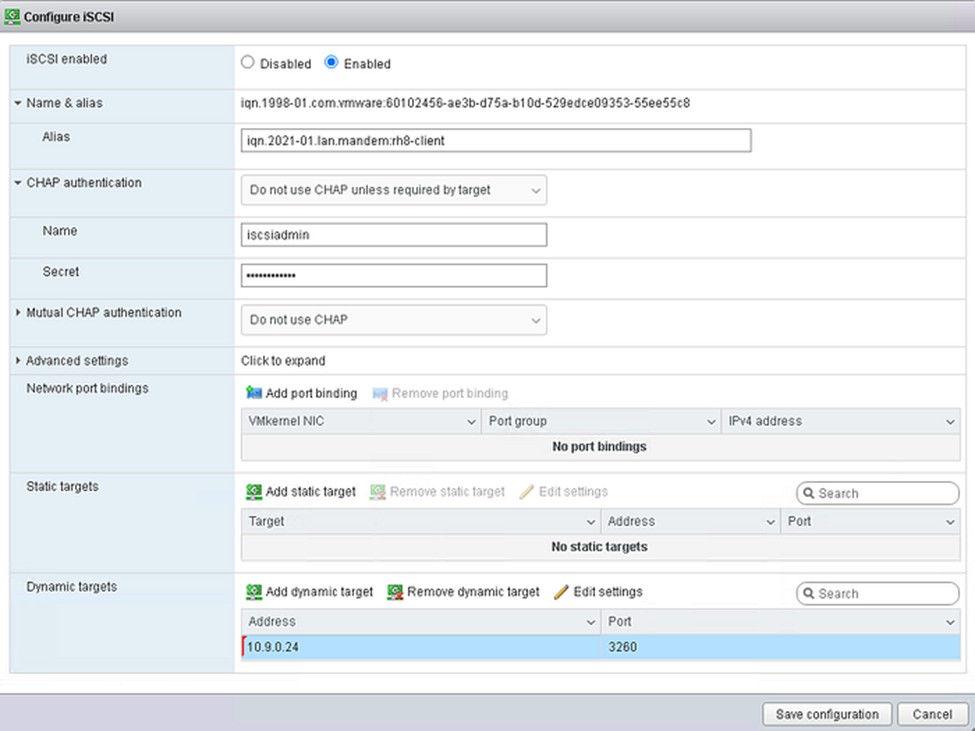
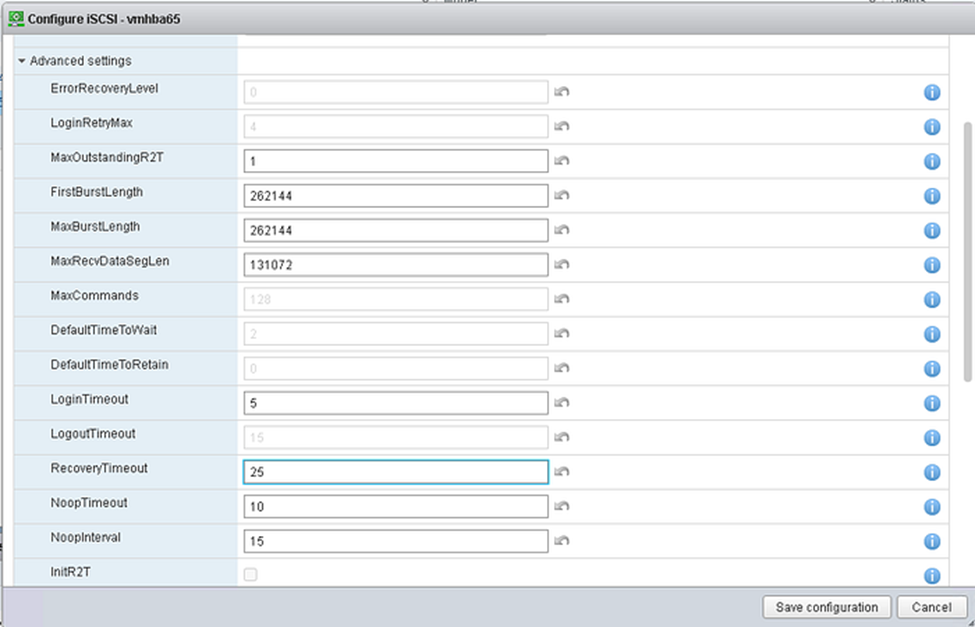
2. Configure ISCSI
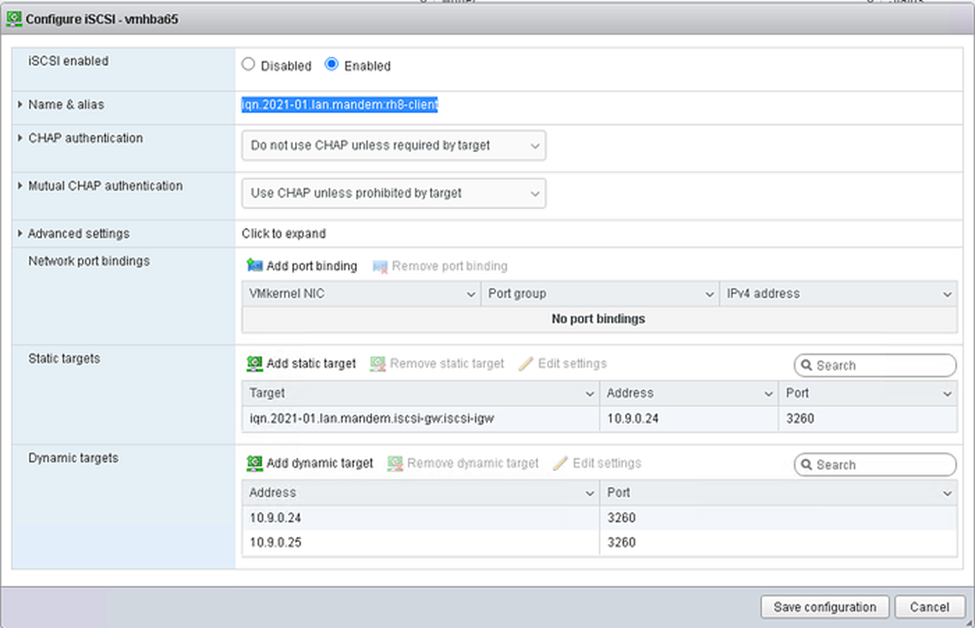
- iSCSI enabled : Enabled
- Alias : iqn.2021–01.lan.mandem:rh8-client
- CHAP authentication
- * Name : iscsiadmin
- * Secret: iscsiadmin01
- Dynamic targets
- * Address : 10.9.0.24 < Address is Ceph2
- * Port : 3260
Save Configuration
3. Right click “Configure iSCSI”.
- Dynamic targets : added the second gateway 10.9.0.15/3260 < Address is the Ceph3
Save Configuration
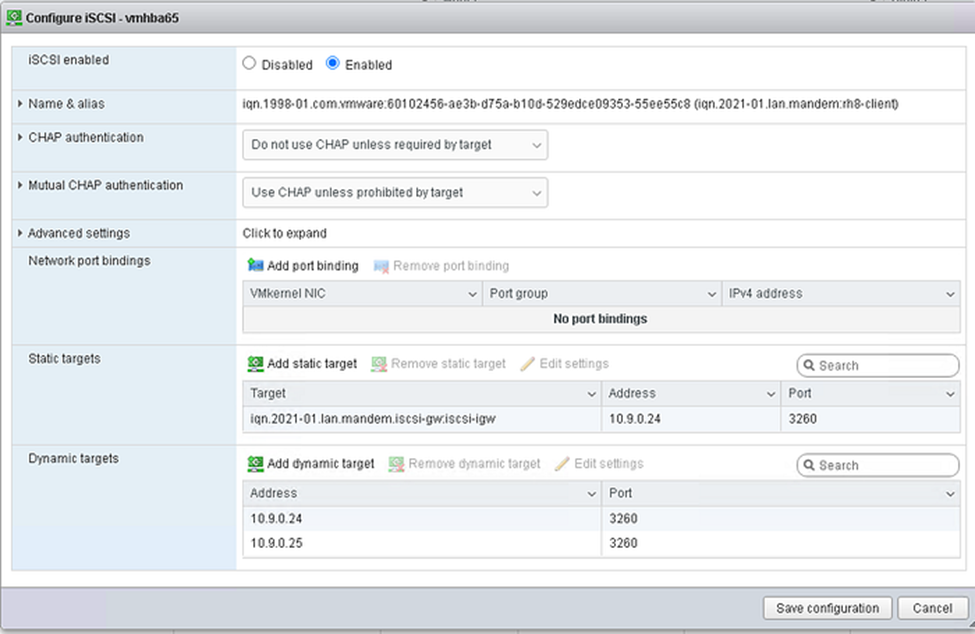
4 . Change initiator name
change initiator name in the “Name & alias” section is not the same name used when creating the client during gwcli setup
[root@esx7:~] esxcli iscsi adapter list
Adapter Driver State UID Description
——- ——— —— ————- ———–
vmhba65 iscsi_vmk online iscsi.vmhba65 iSCSI Software Adapter[root@esx7:~] esxcli iscsi adapter set -A vmhba65 -n iqn.2021-01.lan.mandem:rh8-client
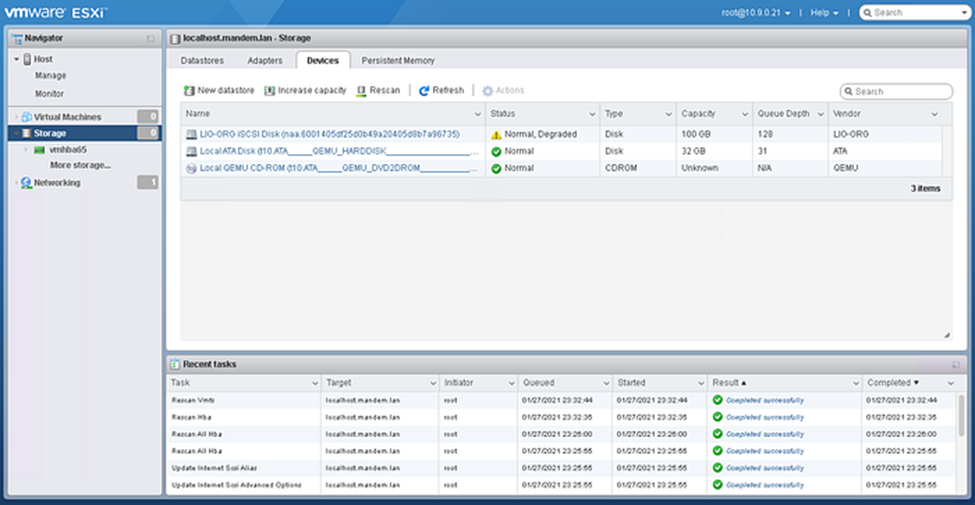
5. Right click “Rescan” & check Devices
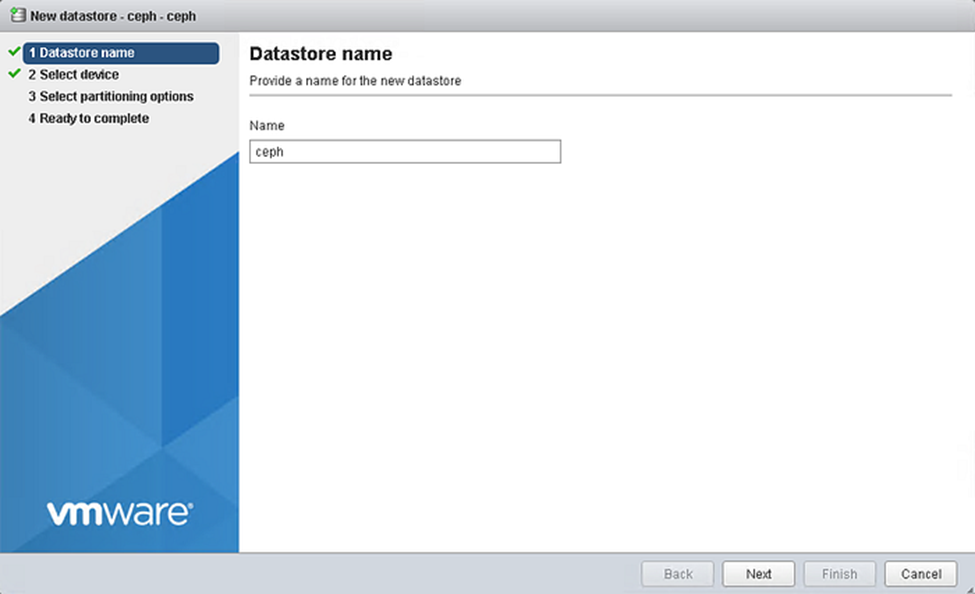
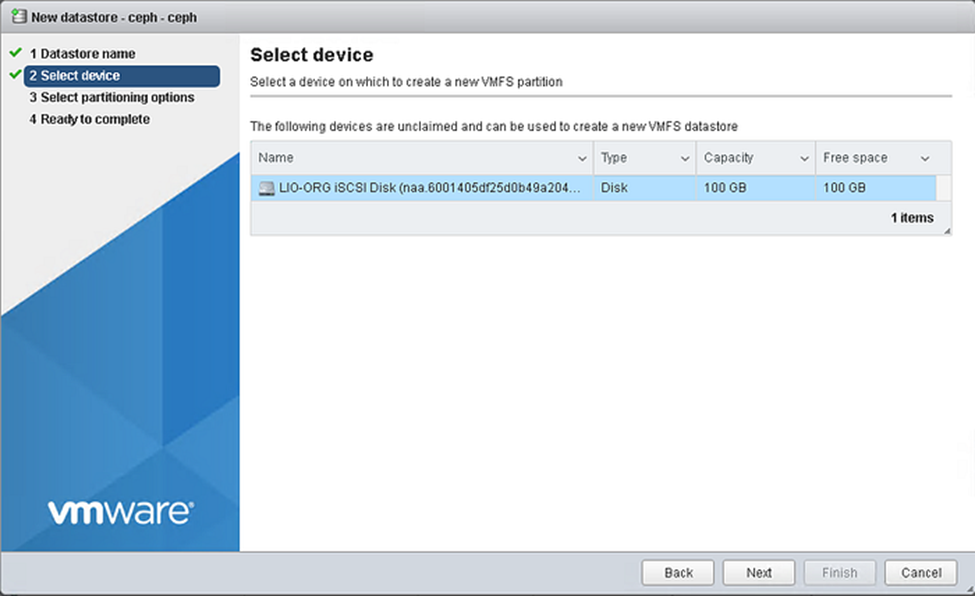
7. Create datastore
Right click “New datastore”
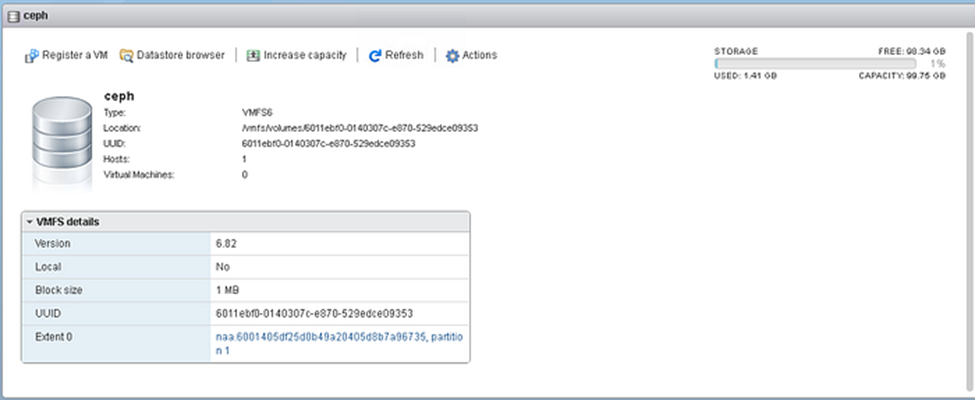
- Name : ceph
- Select device
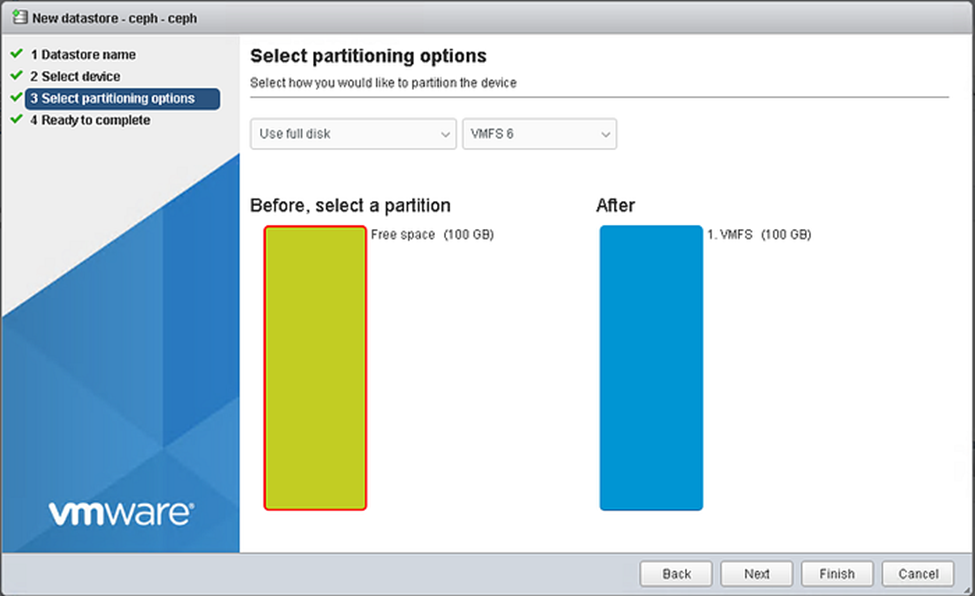
- Select partitioning options
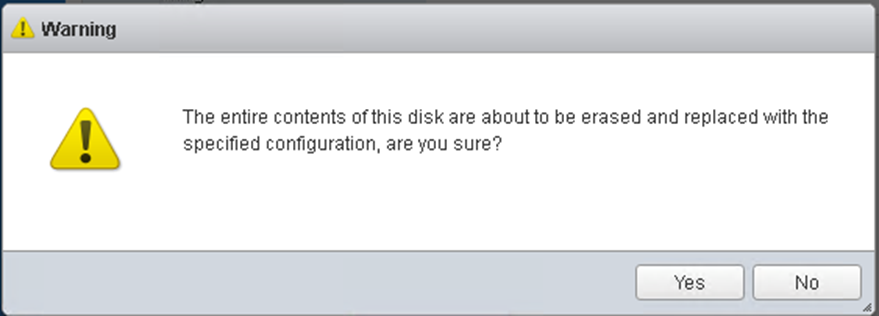
- Ready to complete & Finish
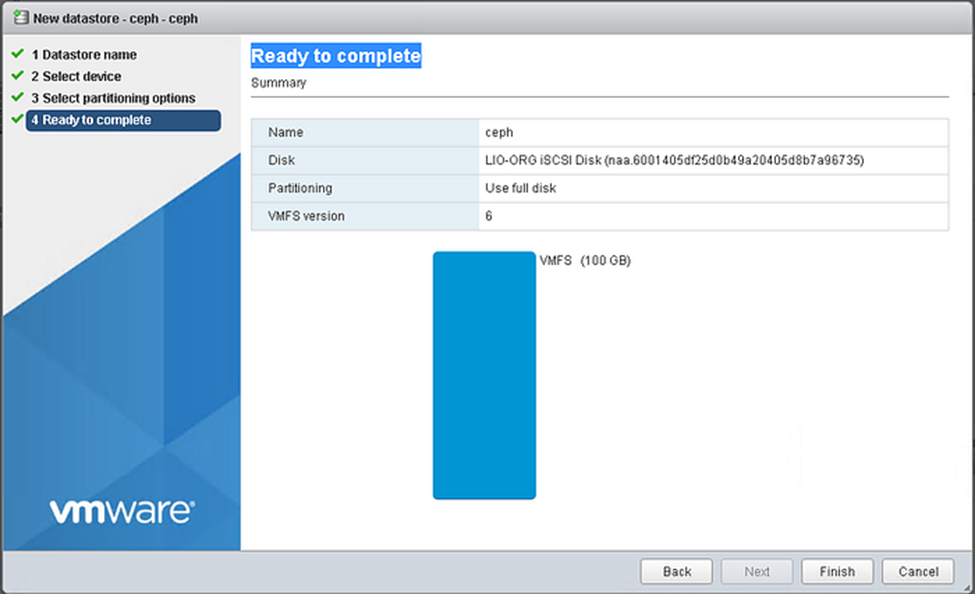
- Check Datastore Ceph